Connect the MCP server to Claude
Goveda Pro exposes its examination workflow as an MCP server, so you can drive it conversationally from Claude — create and open projects, upload an application, run prior art search, and review results, all in chat. Claude also renders Goveda Pro's interactive cards (projects, processing status, search) inline.
Before you start — you'll need a Goveda Pro account (the same one you use
for the web app; your organization and projects are shared across both). The
server URL is https://gp-mcp.goveda.com/mcp.
Connect to Claude
Goveda Pro connects as a custom connector and authenticates by signing in to your Goveda Pro account in the browser (OAuth). The same steps work across claude.ai, Claude Desktop, and Claude cowork.
Signing in is the only way to connect. API keys are not supported for MCP
connections — don't add an apikey parameter to the connector URL, and leave
the OAuth Client ID and OAuth Client Secret fields empty.
Open Connectors
Go to claude.ai/customize/connectors. In Claude Desktop, open Settings → Connectors instead.
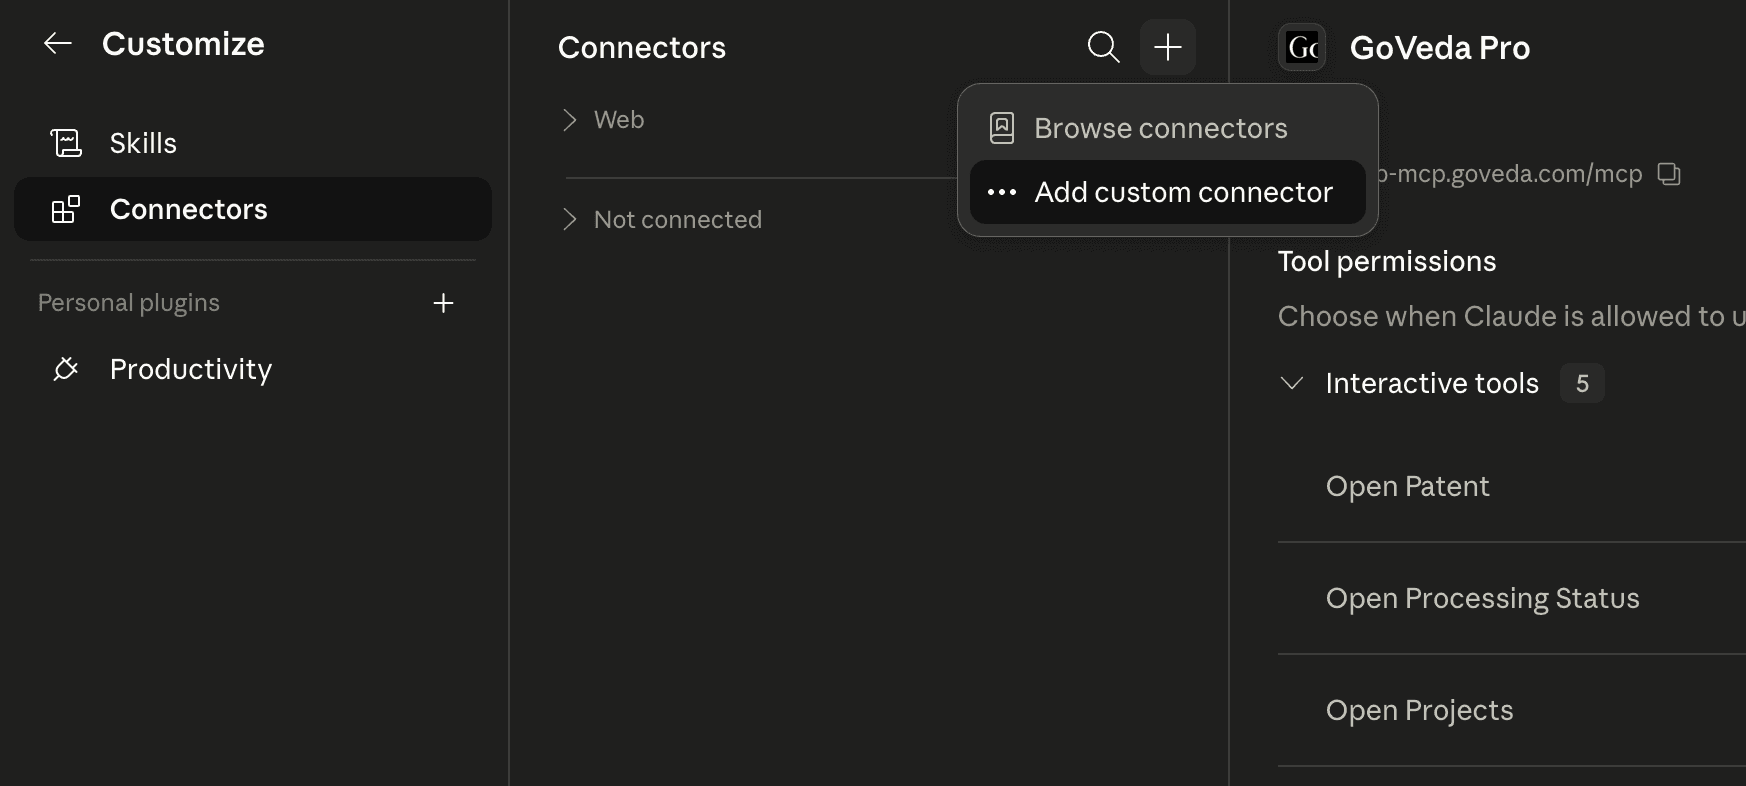
Add a custom connector
Click the + button, then choose Add custom connector.
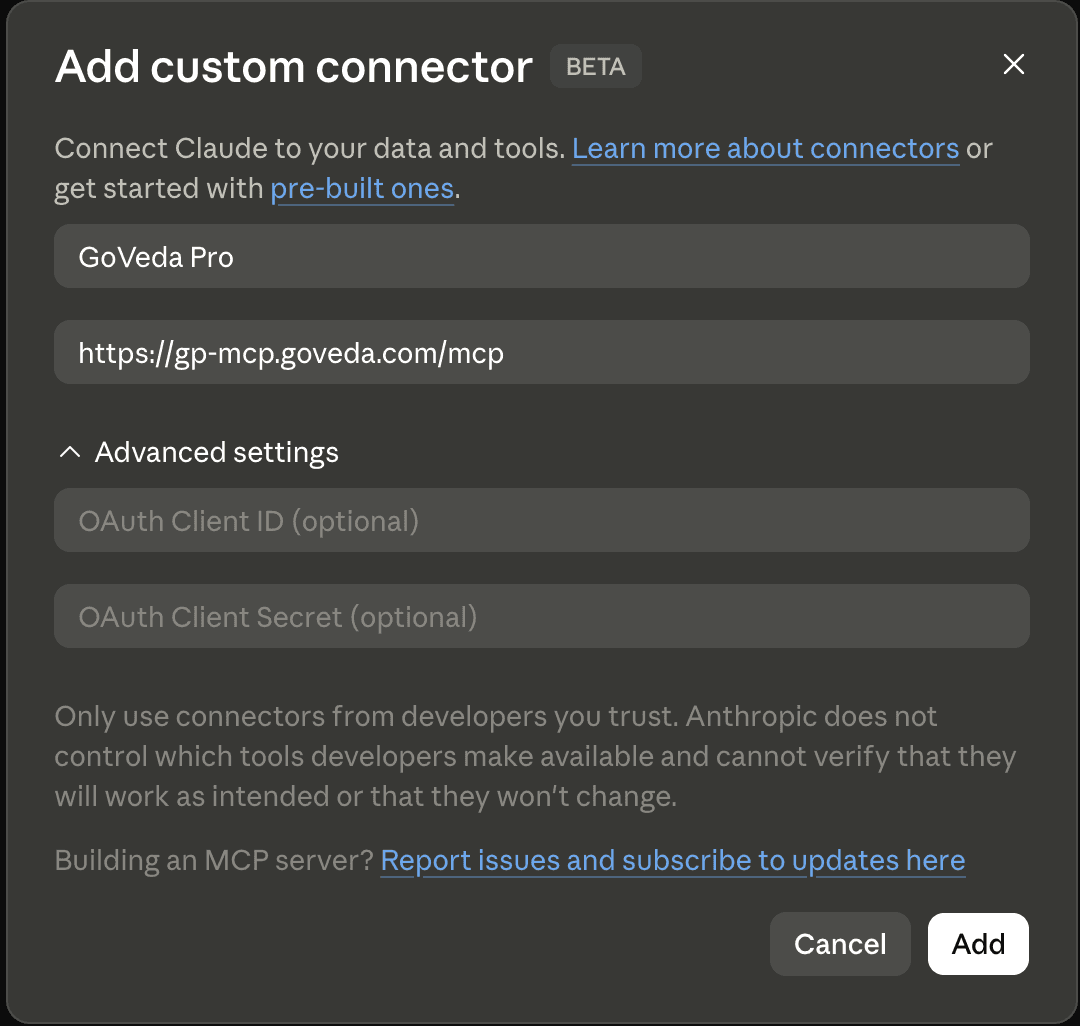
Enter the Goveda Pro details
Fill in the connector form, then click Add:
- Name —
Goveda Pro - URL —
https://gp-mcp.goveda.com/mcp
Leave the OAuth Client ID and OAuth Client Secret fields (under Advanced settings) empty — they aren't needed.
Sign in
A browser window opens for sign-in. Authenticate with your Goveda Pro account and approve access. Goveda Pro then appears under your connectors with its tools listed (Show Projects, Show Project Processing Status, and more).
Tip — fewer prompts. By default Claude asks for confirmation each time it uses a tool. Open the connector's Tool permissions and set the tools to Always allow so the examination workflow runs without interruption.
Using ChatGPT or Gemini Enterprise instead? See Connect to ChatGPT for the Developer Mode setup, or Connect to Gemini Enterprise for the administrator setup.
Signing in with your organization's SSO
If your organization signs in through its own identity provider — Microsoft Entra ID, Okta, or similar — connecting the MCP server works exactly like signing in to the web app. There is no separate SSO option to choose.
- Enter your work email. The sign-in window asks for your email first. If your organization's domain is set up for single sign-on, you're sent to your identity provider to authenticate. You're never asked for an organization name.
- The organization comes from the sign-in. If you belong to more than one Goveda Pro organization, you're asked which one to use, and the connection stays bound to it — every tool then acts in that organization. To work in a different one, reconnect and pick it during sign-in.
- Where SSO is enforced, it's the only way in. Password and social sign-ins no longer satisfy the policy, and API keys are not an alternative route — the connection has to be authorized through your identity provider.
- If sign-in is refused, ask your organization's Owner to check your access. They manage single sign-on under Settings → Organization → Security & SSO, including linking existing members to the identity provider.
What you can do
Once connected, you can run the examination workflow from chat:
- Create and open projects
- Upload an application and read it — bibliographic data, full text, and the AI summary
- Search and read the reference PDFs in a Project's Knowledge Base
- Run prior art search and inspect the results, plus the system's recommended prior art
- Review the Lack of Unity analysis and export prior art to CSV
For the full workflow, see How it works. For the exact tools available — and what's still on the roadmap — see the Tool reference. For end-to-end examples, see Sample sessions.